Spending your Friday evening doing back strengthening exercises may not catch your attention with ease. Yet, working to develop and maintain the muscles in your lower back can help make your favorite weekend activities more enjoyable. In fact, you may be able to add a few new activities that you have not been able to do due to your discomfort. You are in the right place if you are looking for attainable ways to improve your lower back pain with practicality. You might read through these exercises for strengthening your back and think, “Hmm. How would that stance help to take my pain away.” Once you put a few into practice, you will easily feel and recognize the benefit of each motion.((Medical News Today:
Home remedies for fast back pain relief)) Your body may need a few gentle reminders each week to help get your muscles and joints back into pain-free cooperation with one another. We have a list of back strengthening exercises just for that purpose. Pick your favorites, and get started!
Benefits of Back Strengthening Exercises
Once you get into a routine and begin to draw from your own hard work, you may end up surprising yourself with how much better you feel. Your lower back needs your support to do its job well. Selecting and regularly completing yoga-style exercises can help you care for your lower back and its surrounding muscle partners.((Better Health Chiropractic & Physical Rehab:
11 Secrets for Getting Rid of Back Pain)) Even just a few days per week with these 12 exercises can help provide your muscles and joints with a sense of functionality that may have been lost or ‘misplaced’ along the way. It may not have happened all at once, and you may not have even realized for some time that a slow change was taking place in the core of your body. Injuries can happen in an instant or slowly over time, but they almost always take time to heal. Perhaps, you experienced an injury and have yet to recover fully. Start small and work your way to a full recovery.
Moderate activity that matches your current condition is far more beneficial than too much activity or none and all.((Medline Plus:
Taking care of your back at home)) It may be that you are not directly able to pinpoint or verbally specify where your back pain or discomfort originates. Take your time working through these 12 back strengthening exercises.
Try to focus on one portion of your body at a time. Be mindful of how new your injury or pain discomfort seems to be. Acute pain may need a few days or more of rest and recovery before you begin working to build strength. Do not feel as though you must do all of the exercises each session. As you work to get rid of your lower back pain, it is going to be more important for you to go slow and ensure that each movement benefits your body. Consciously working to
recognize where pain starts and what might cause it can help you better focus your process of healing. Regardless of how you acquired lower back pain, be patient with yourself as you work to recover. Be sure to push your body through uncomfortable moments, but work to avoid pushing yourself so hard that you cause further injury or create a new injury. Working with your lower back muscles can help your body be better equipped to handle the unexpected.((National Institutes of Health:
Yoga or Stretching Eases Low Back Pain)) Go slow, take your time, be consistent and work hard; and you will recover efficiently. Start with a couple of exercises from each category and rotate through the different ones. Mixing up the exercises will help keep your brain interested as you work to develop a routine for healing.
12 Lower Back Focus Exercises
Directly focusing on lower back muscles and connections in the body is essential for proper recovery from pain, injury, or general discomfort.((SPINE-health:
Exercise and Back Pain)) Take your time with each exercise. Start with a few repetitions, and work your way up to your desired goal over a period of weeks or maybe even a few months if needed.
1. Knee to Chest Raises
Rest with your back flat on the floor, knees bent, and feet flat on the floor. Place your hands palm down on the floor. Bring your right knee to your chest and hold for five to ten seconds. Switch sides. Repeat ten times.
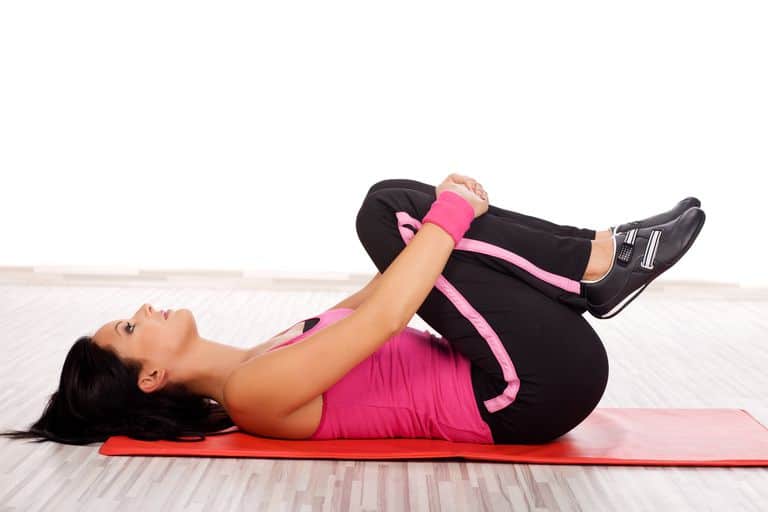
You may also choose to allow your opposing leg to rest in a straightened position.((verywellhealth:
Knees to Chest Raises))
2. Floor Swimming
Rest prone (face down) on the floor. Bring both arms flat and stretch them straight out from your shoulders. Legs should be straight and flat on the floor with toes relaxed. Keep your head relaxed and face the floor. Raise your right arm and left leg. Count to five. Switch sides. Raise both arms and both legs while keeping your torso on the floor. Count to five. Repeat the series five to ten times slowly.
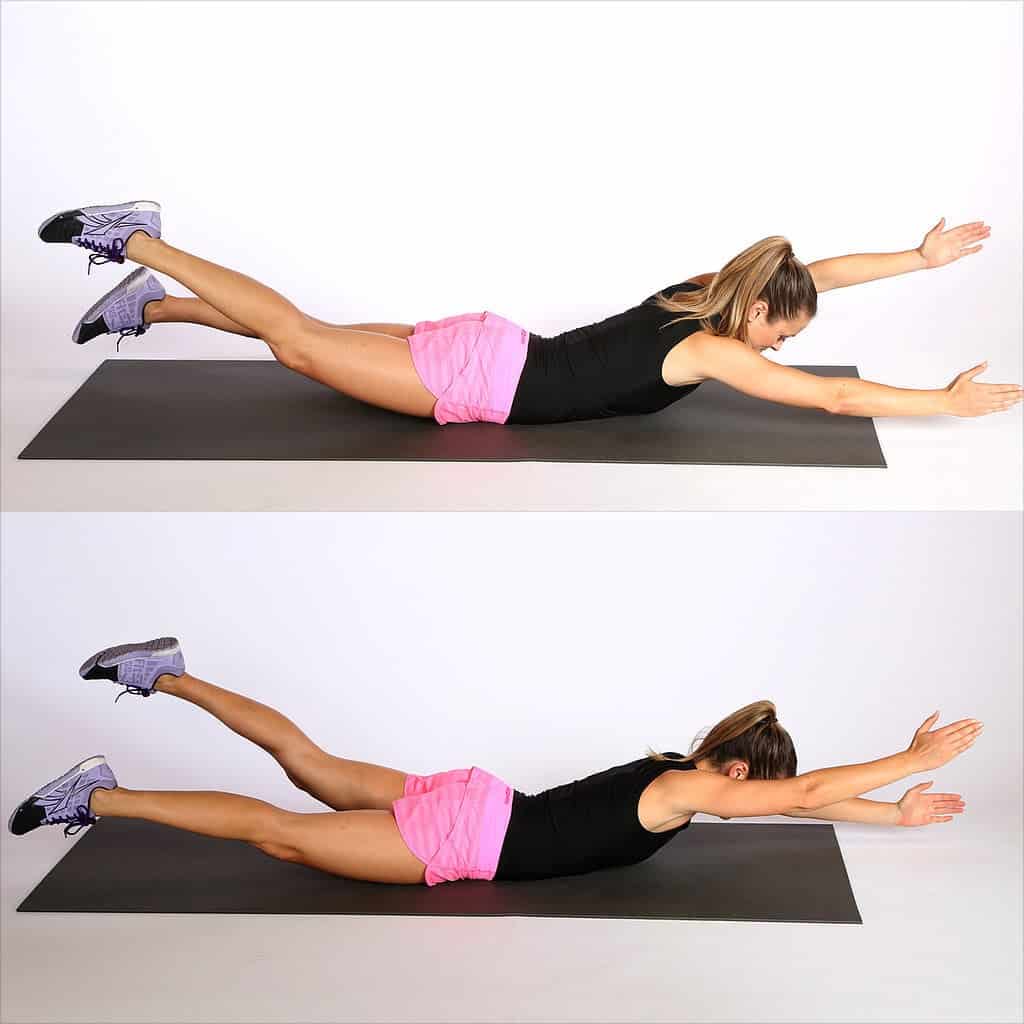
Floor swimming can be done in reverse while in a supine (face up) position if abdominal work is desired, but be careful to keep your back flat and only raise one leg at a time.((PopSugar:
No Need to Stand! Work Your Butt With These Floor Exercises))
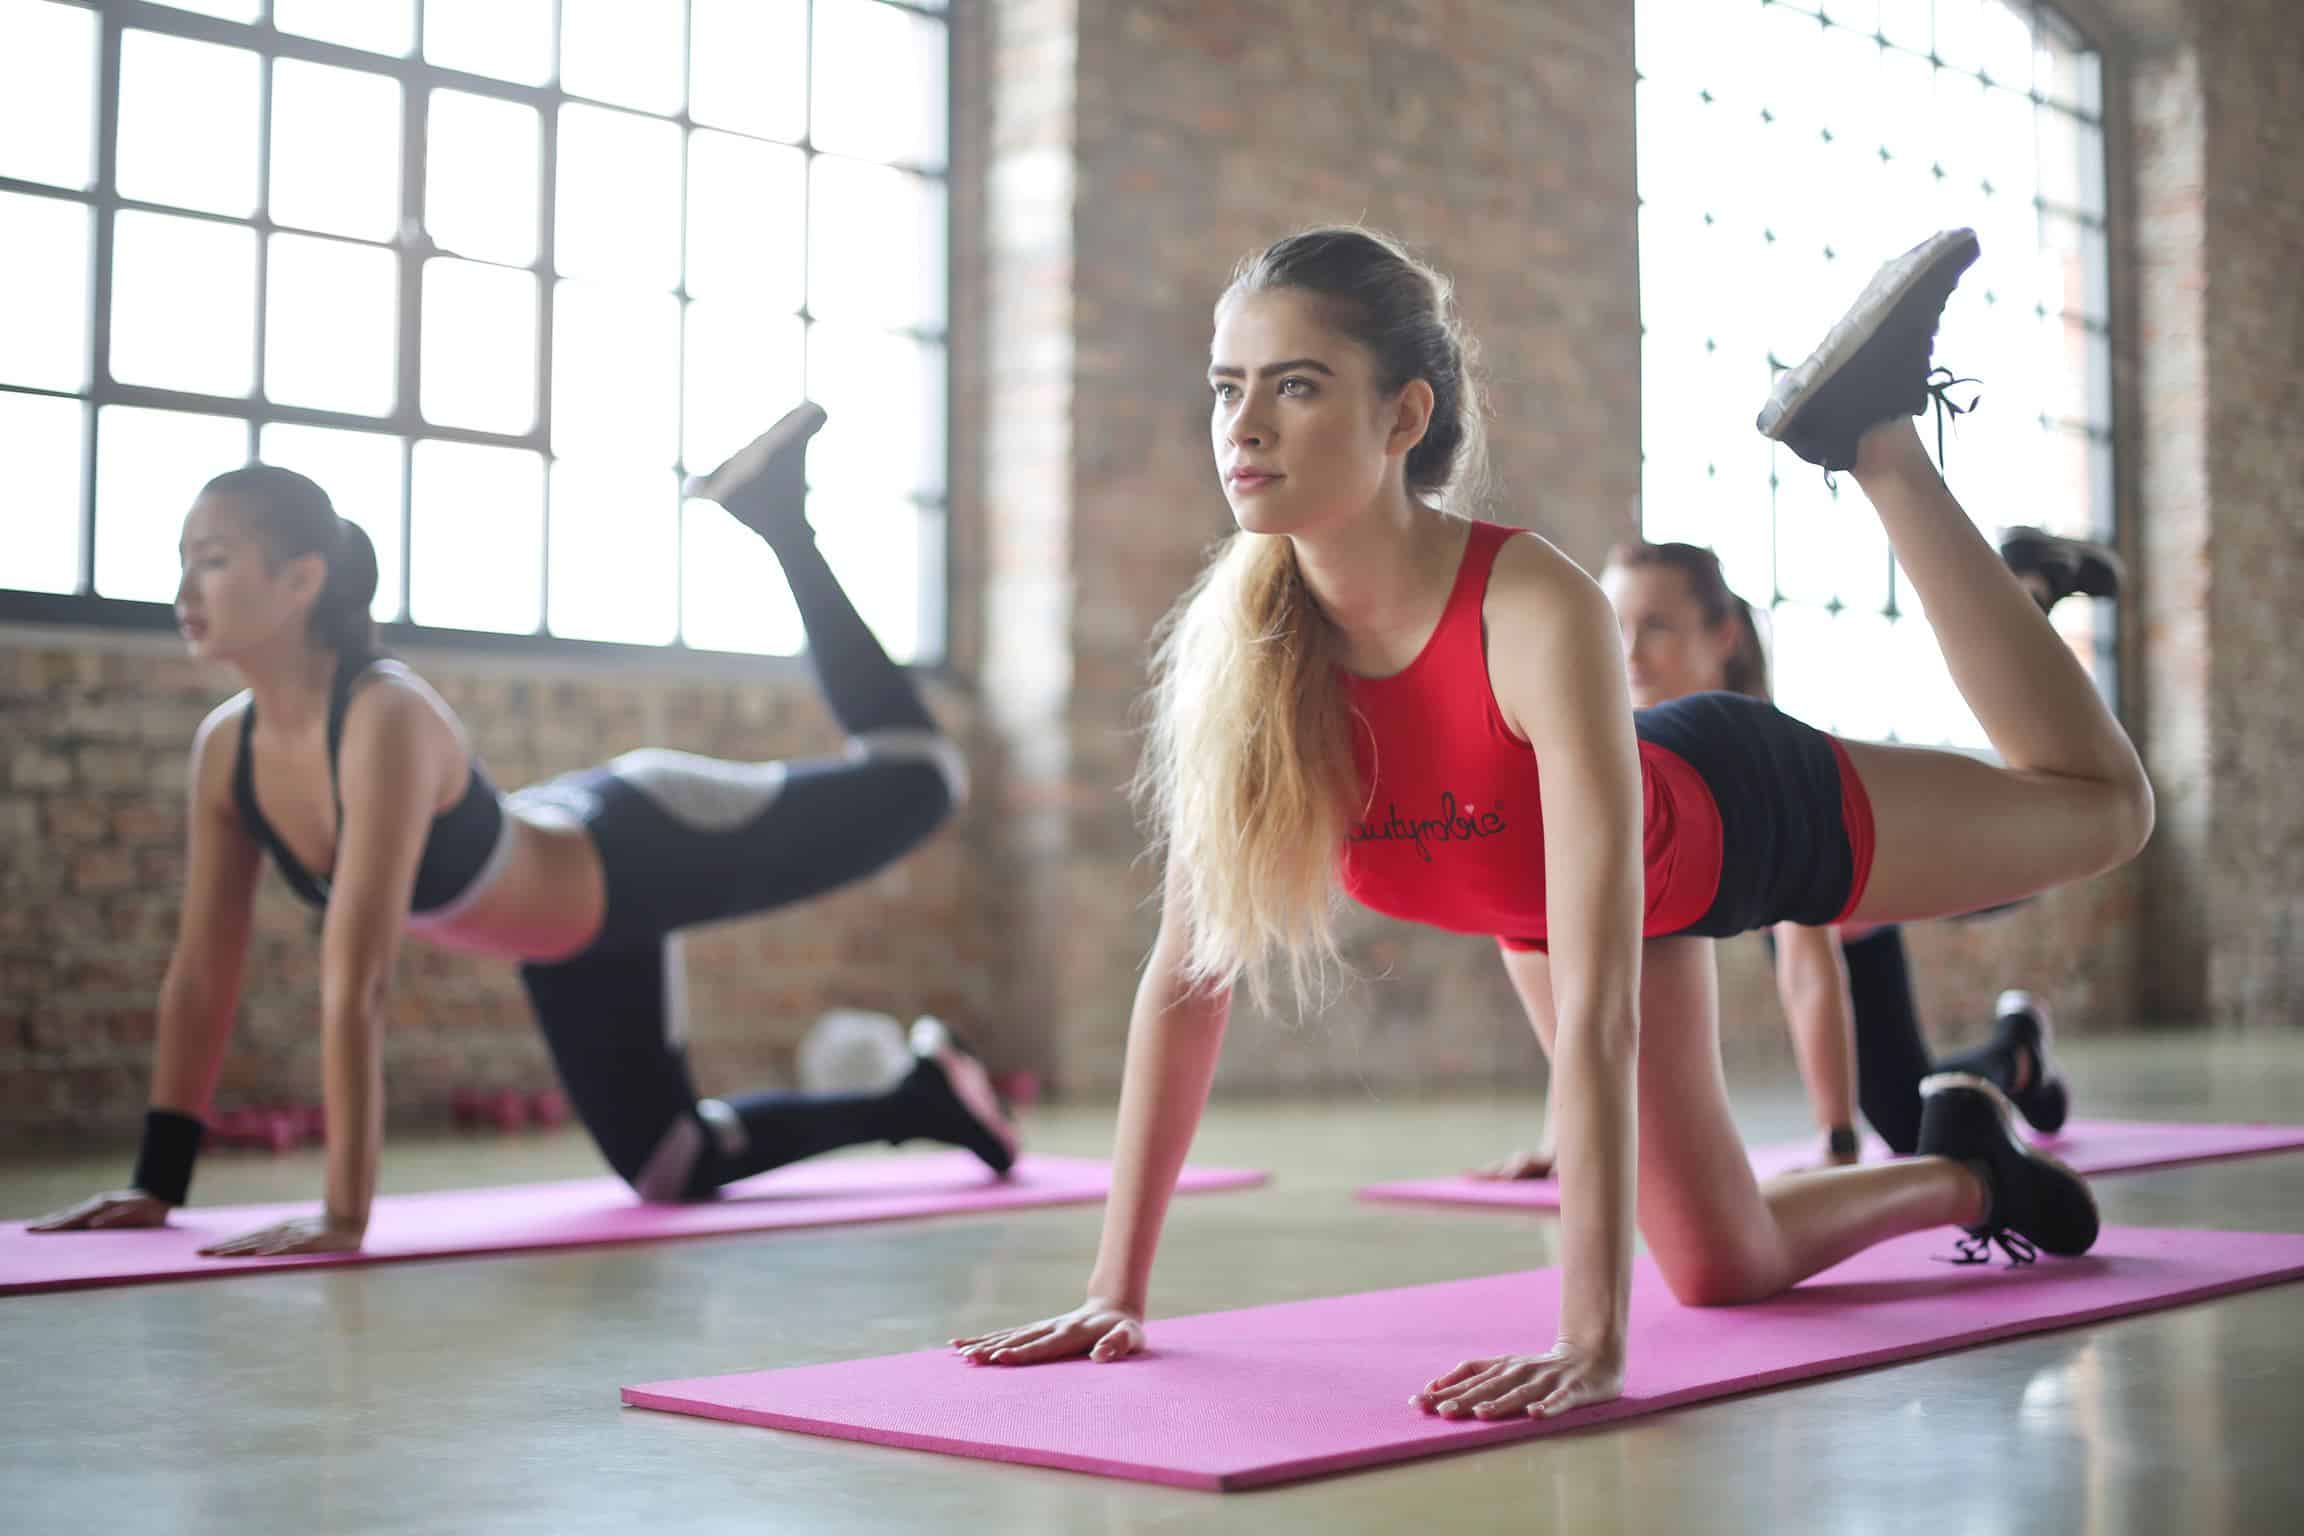
3. Straight Leg Raises (from Table Top Position)
Start in Table Top position with knees and hands on the floor. Straighten your right leg directly behind you so that it is parallel to the floor. Work to keep your right leg straight as you gently raise and lower it ten times. Switch sides. Repeat three to ten times as your ability increases.
4. Bridge
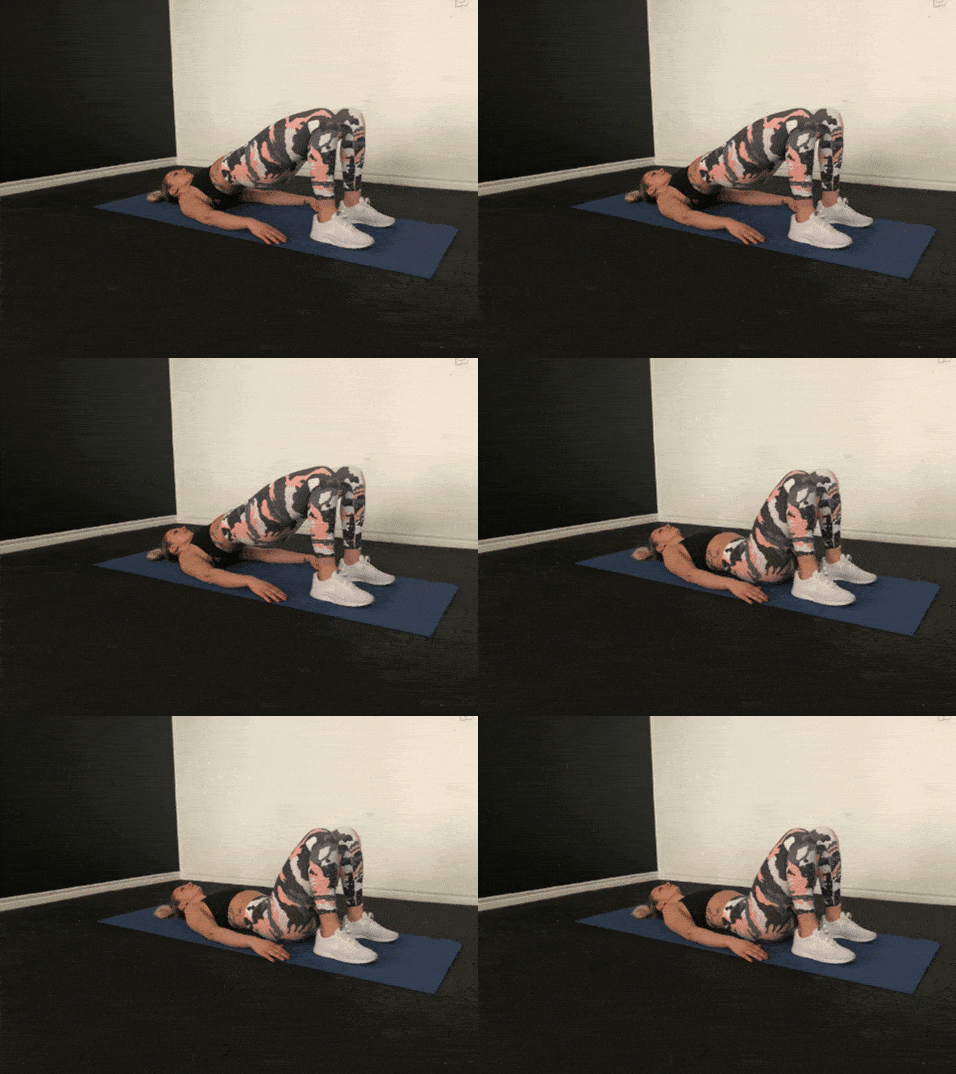
Rest flat on your back. Place your feet flat on the ground with your knees bent.((Shape Magazine:
2 Glute Bridge Exercise Variations to Target Specific Results)) Gently raise your hips and torso to form a triangle shape between your head, knees, legs, and the floor. Your head and shoulders will remain on the floor. You may rest your hands palm down on the floor or reach to touch your fingers together under your back. Squeeze your buttocks, and push down into the floor with your feet as you hold your torso off of the ground. Hold for a count of ten. Repeat five to ten times.
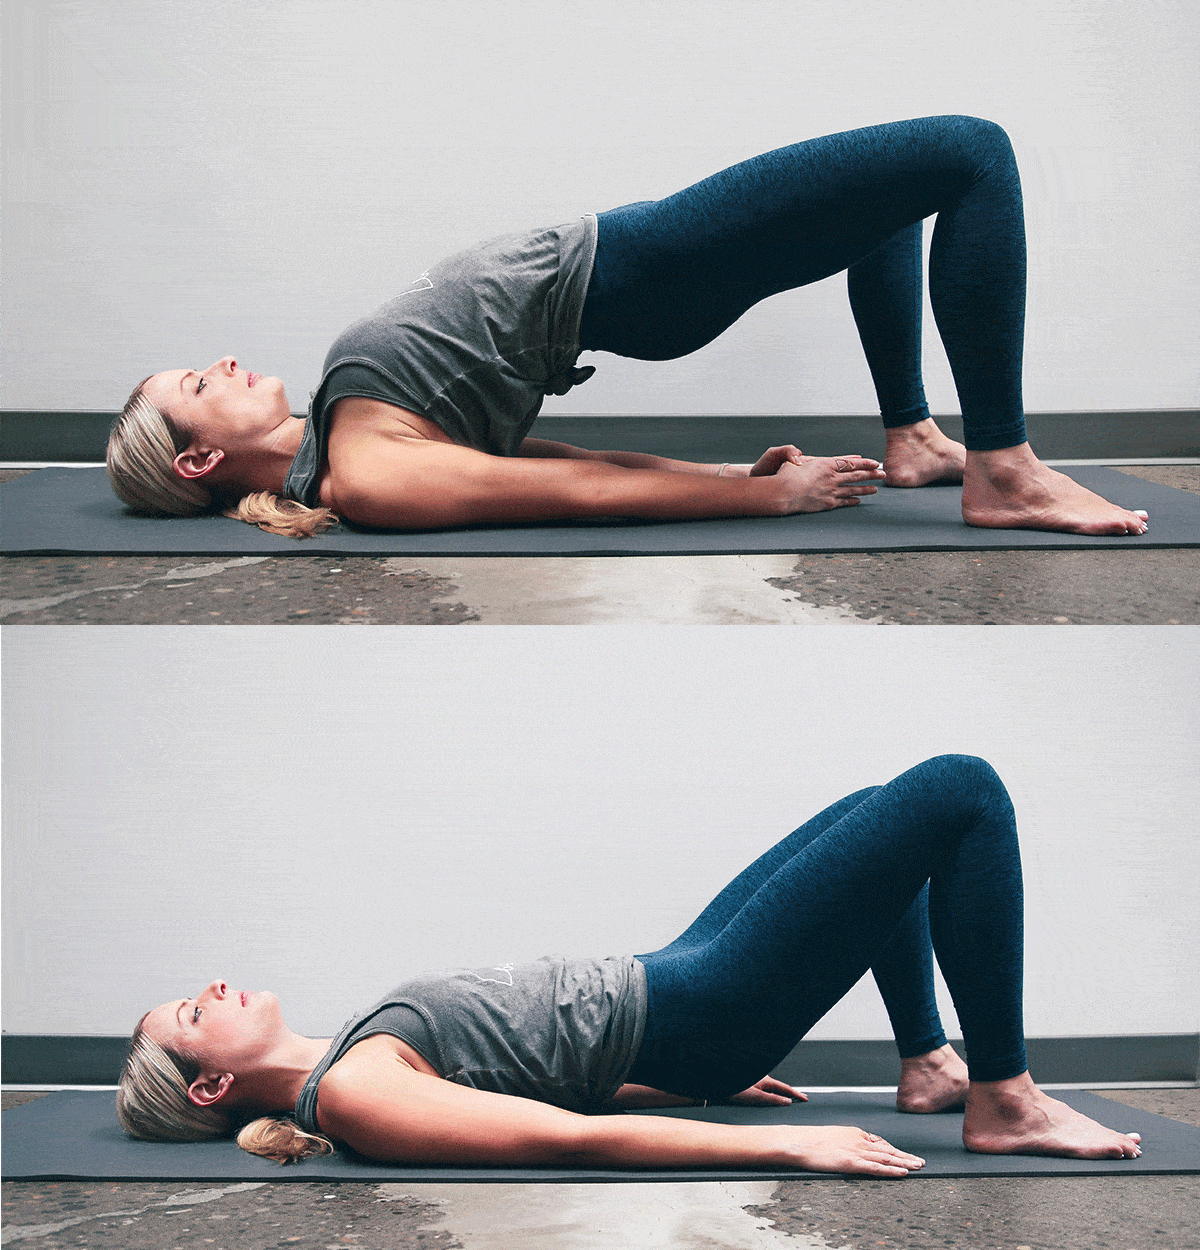
If you have experienced a severe neck injury, you may want to wait until your neck improves or inquire with a chiropractic doctor before starting with Bridge.
Upper Back Focus Exercises
Your pain may be centralized in your lower back, but your upper back may begin to feel the strain if recovery does not allow your body to function as a unit. Giving your upper back some love will help you reunite your lower back to the rest of your body. Incorporate these upper back exercises into your routine for better comfort in your lower back muscles.
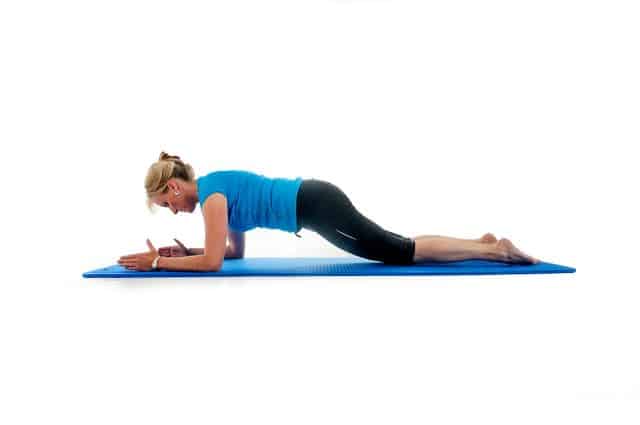
5. Modified Plank
Back pain sufferers will do well to begin with a Modified Plank. For this, allow your knees and hands to rest on the floor as you work to hold your torso off of the floor.((Hemmett Health:
The Power of a Proper Plank)) Keep your arms directly under your shoulders, and your knees and lower legs on the floor behind you. Do not let your hips dip toward the floor. Hold for a count of five to ten. Remember to breathe. Repeat three to ten times increasing the number as your pain diminishes and your strength builds. Be sure not to hold your position for longer than your body can handle, especially in the beginning.
6. Front Plank
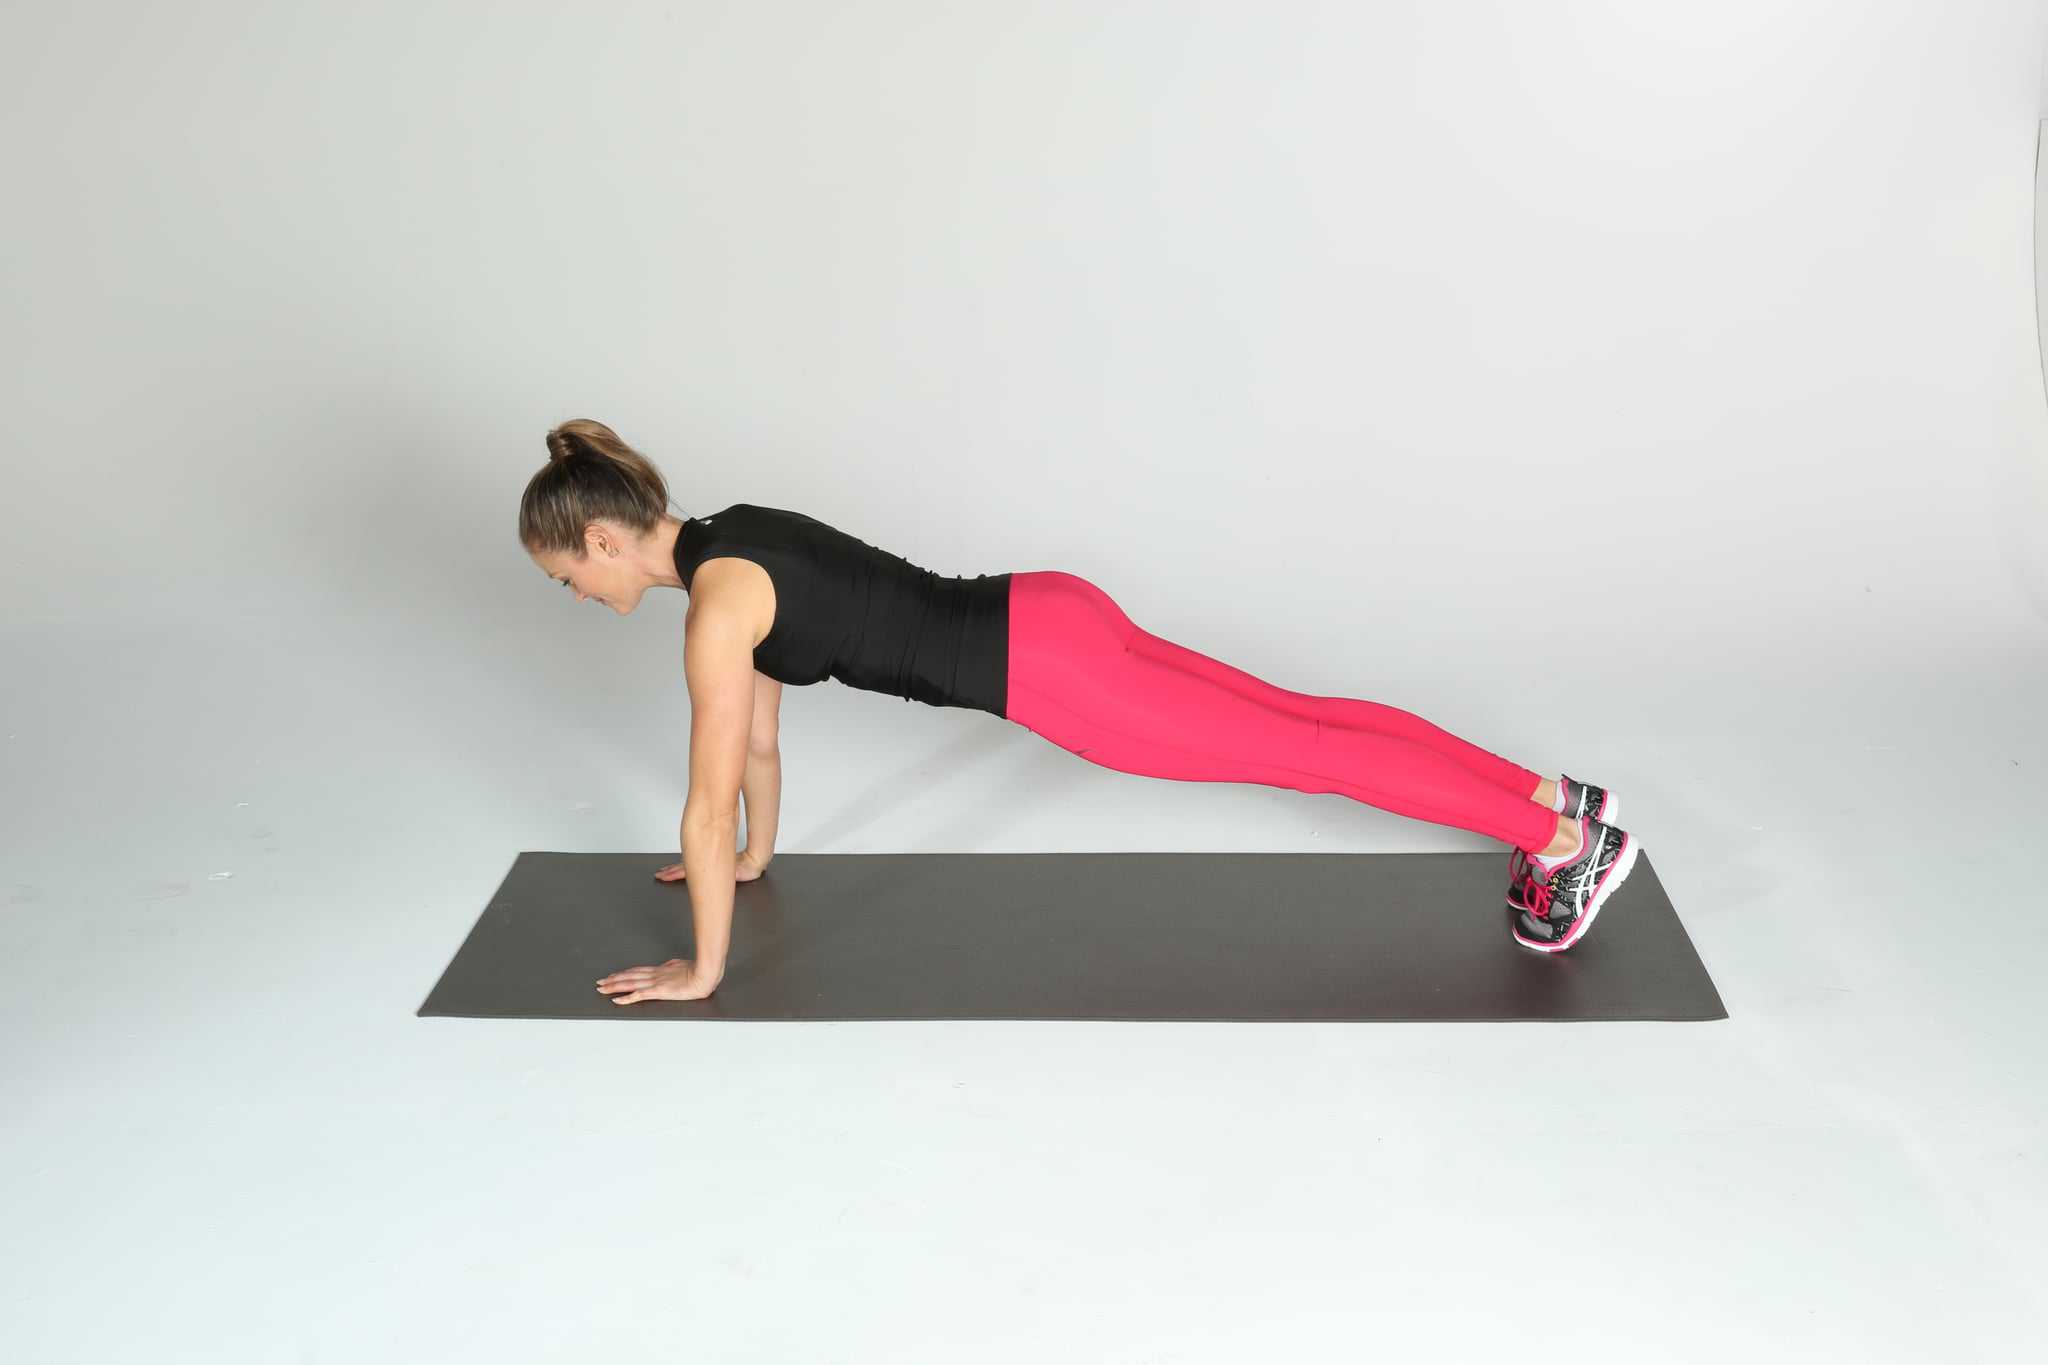
If you have begun to recover from lower back pain and are looking to minimize pain in the future, Front Plank is a great choice.((PopSugar:
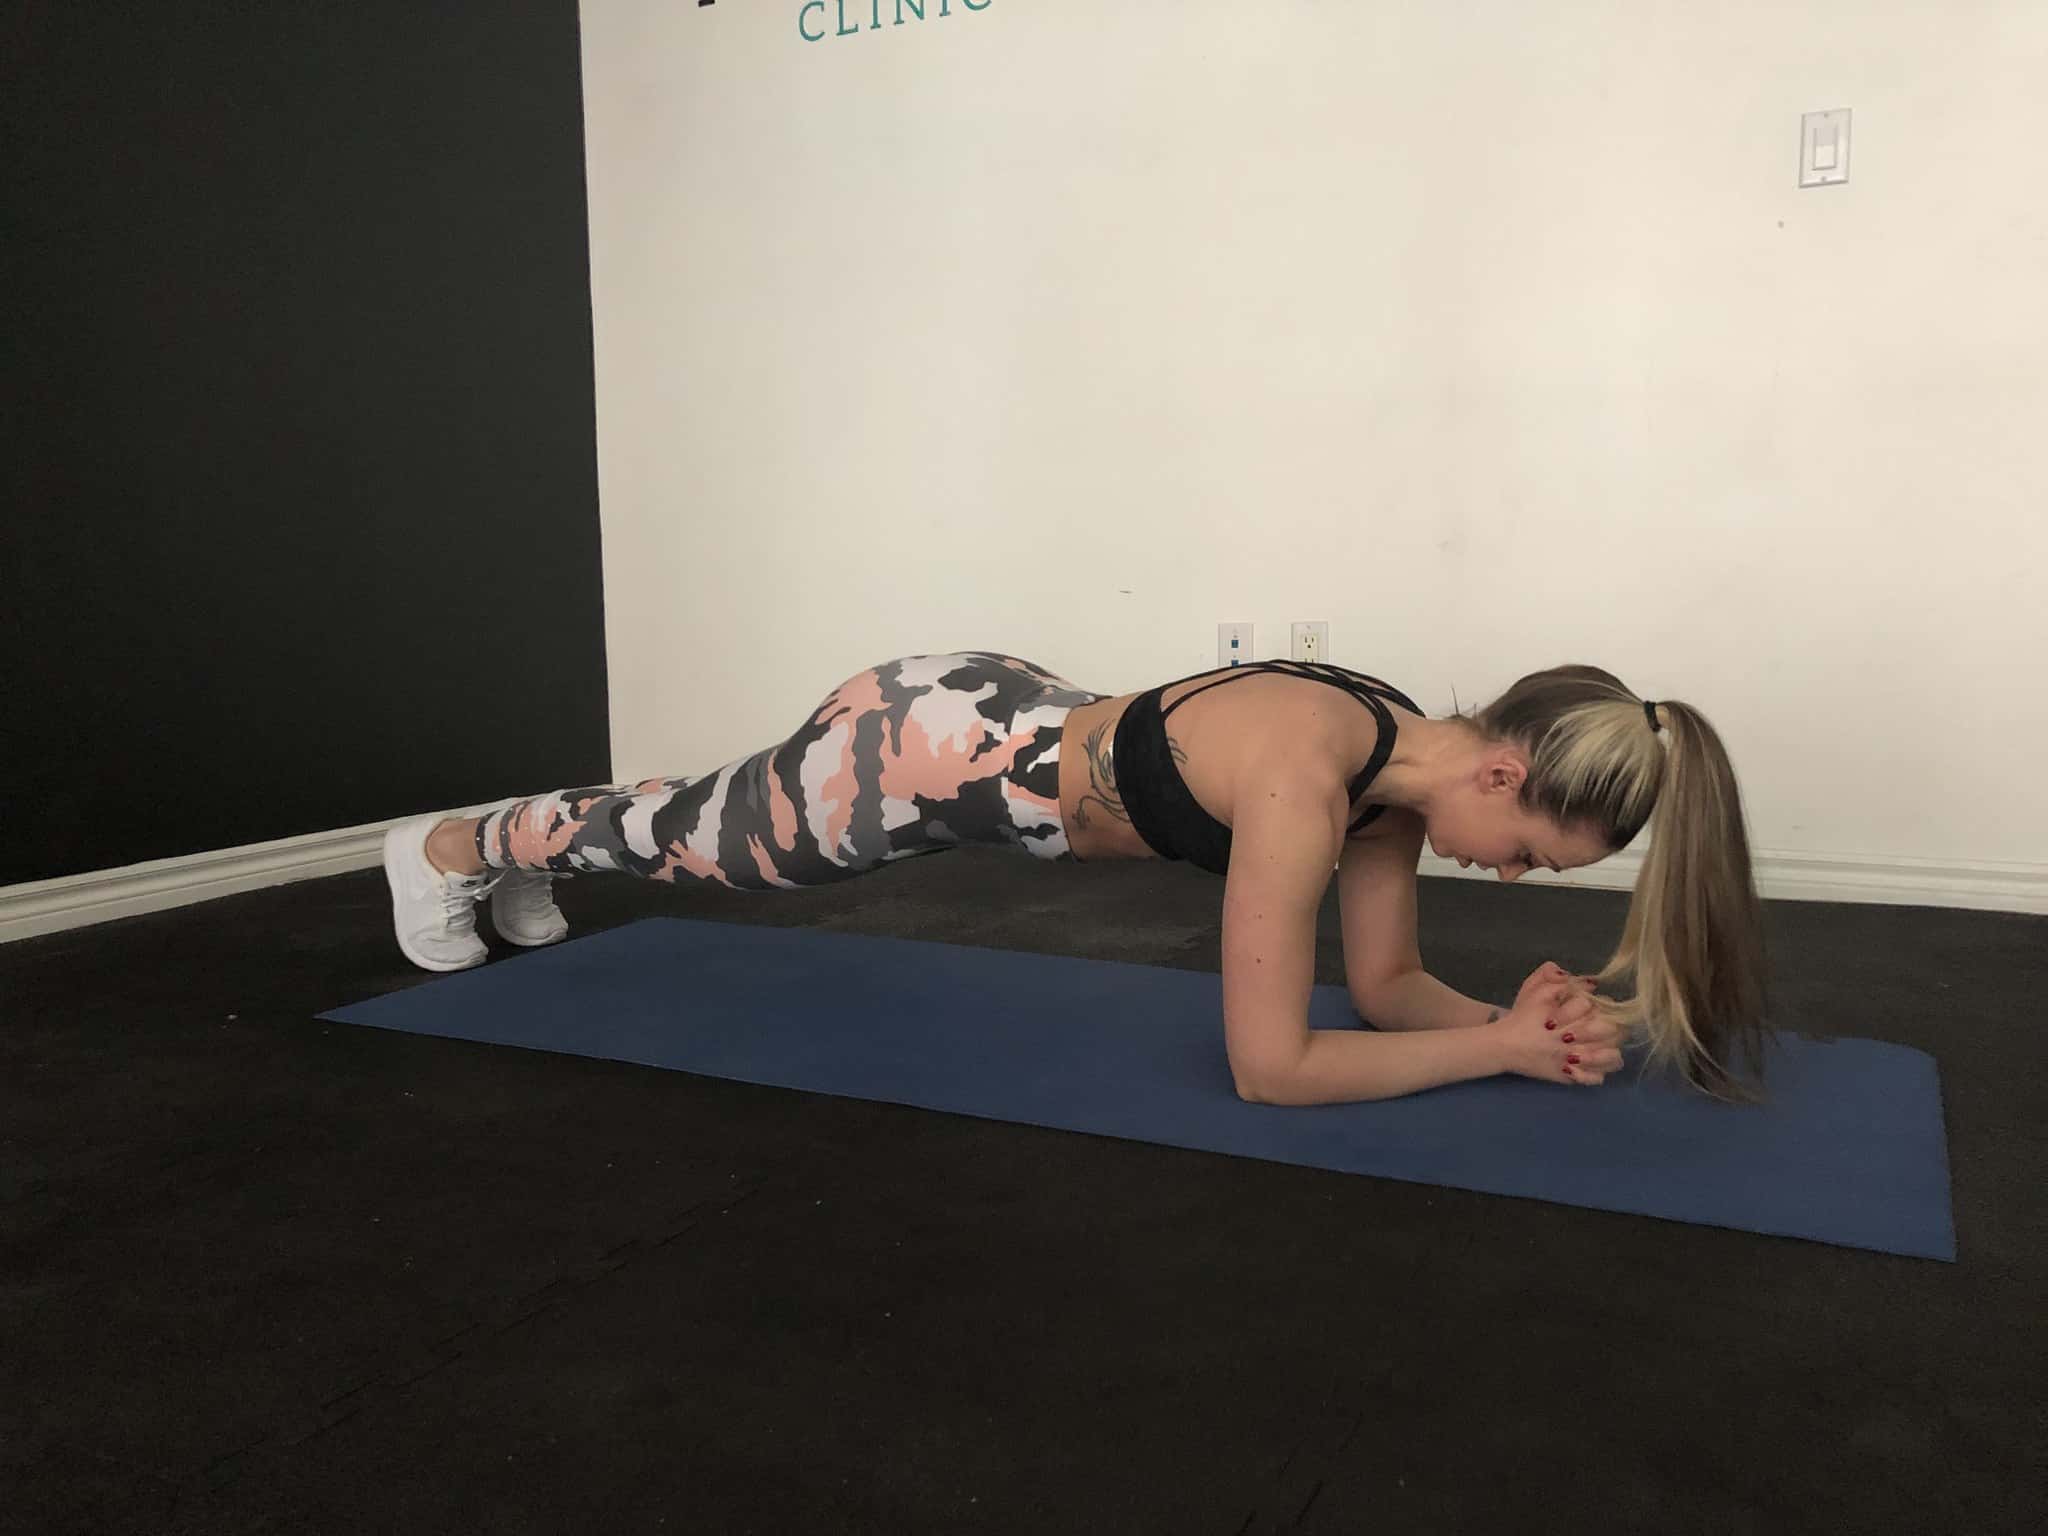
Doing This Exercise For Just 3 Minutes a Day Will Put You on the Road to Tighter Abs)) Begin with your hands and feet on the floor: Your hands should be directly under your shoulders with your fingers and thumbs open and comfortable. Legs straight. Toes curled. Try to imagine a straight line from the top of your head to your heels. The work comes in trying to keep your torso from bowing down without raising your hips too high.
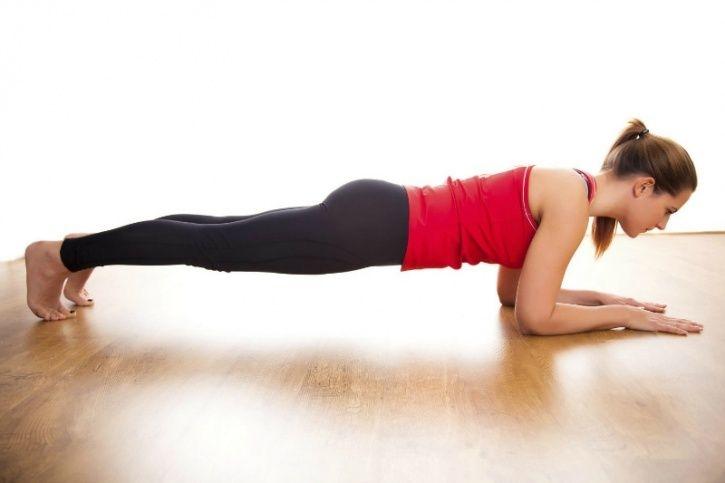
For added variety, try planking with your elbows and forearms on the floor instead of just your hands.((India Times:
7 Surprising Benefits Of Doing the Plank Exercise Every Day)) For the elbow and forearm style, imagine that your body is parallel to the floor. Hold your chosen position for a count of five to ten. Rest. Repeat three to ten times increasing the amount of time as you gain strength.
7. Side Plank
Be prepared to engage your sense of humor if you have not tried this one yet. Side plank is excellent for helping to build supporting back muscles (obliques especially), but it does take some practice getting started. Sit on the floor. Begin with your right side resting on your right elbow. (This should look similar to how you might relax and watch a movie on the floor. Your head may even rest in your right hand as you begin.)((Women's Health Mag:
How To Do A Side Plank Flawlessly)) As you are able, gently push your hips upward to form an elongated triangle shape between you and the floor. It may take a few days of practice, but once you can to get into position, try counting to three, then to five, and then to ten.
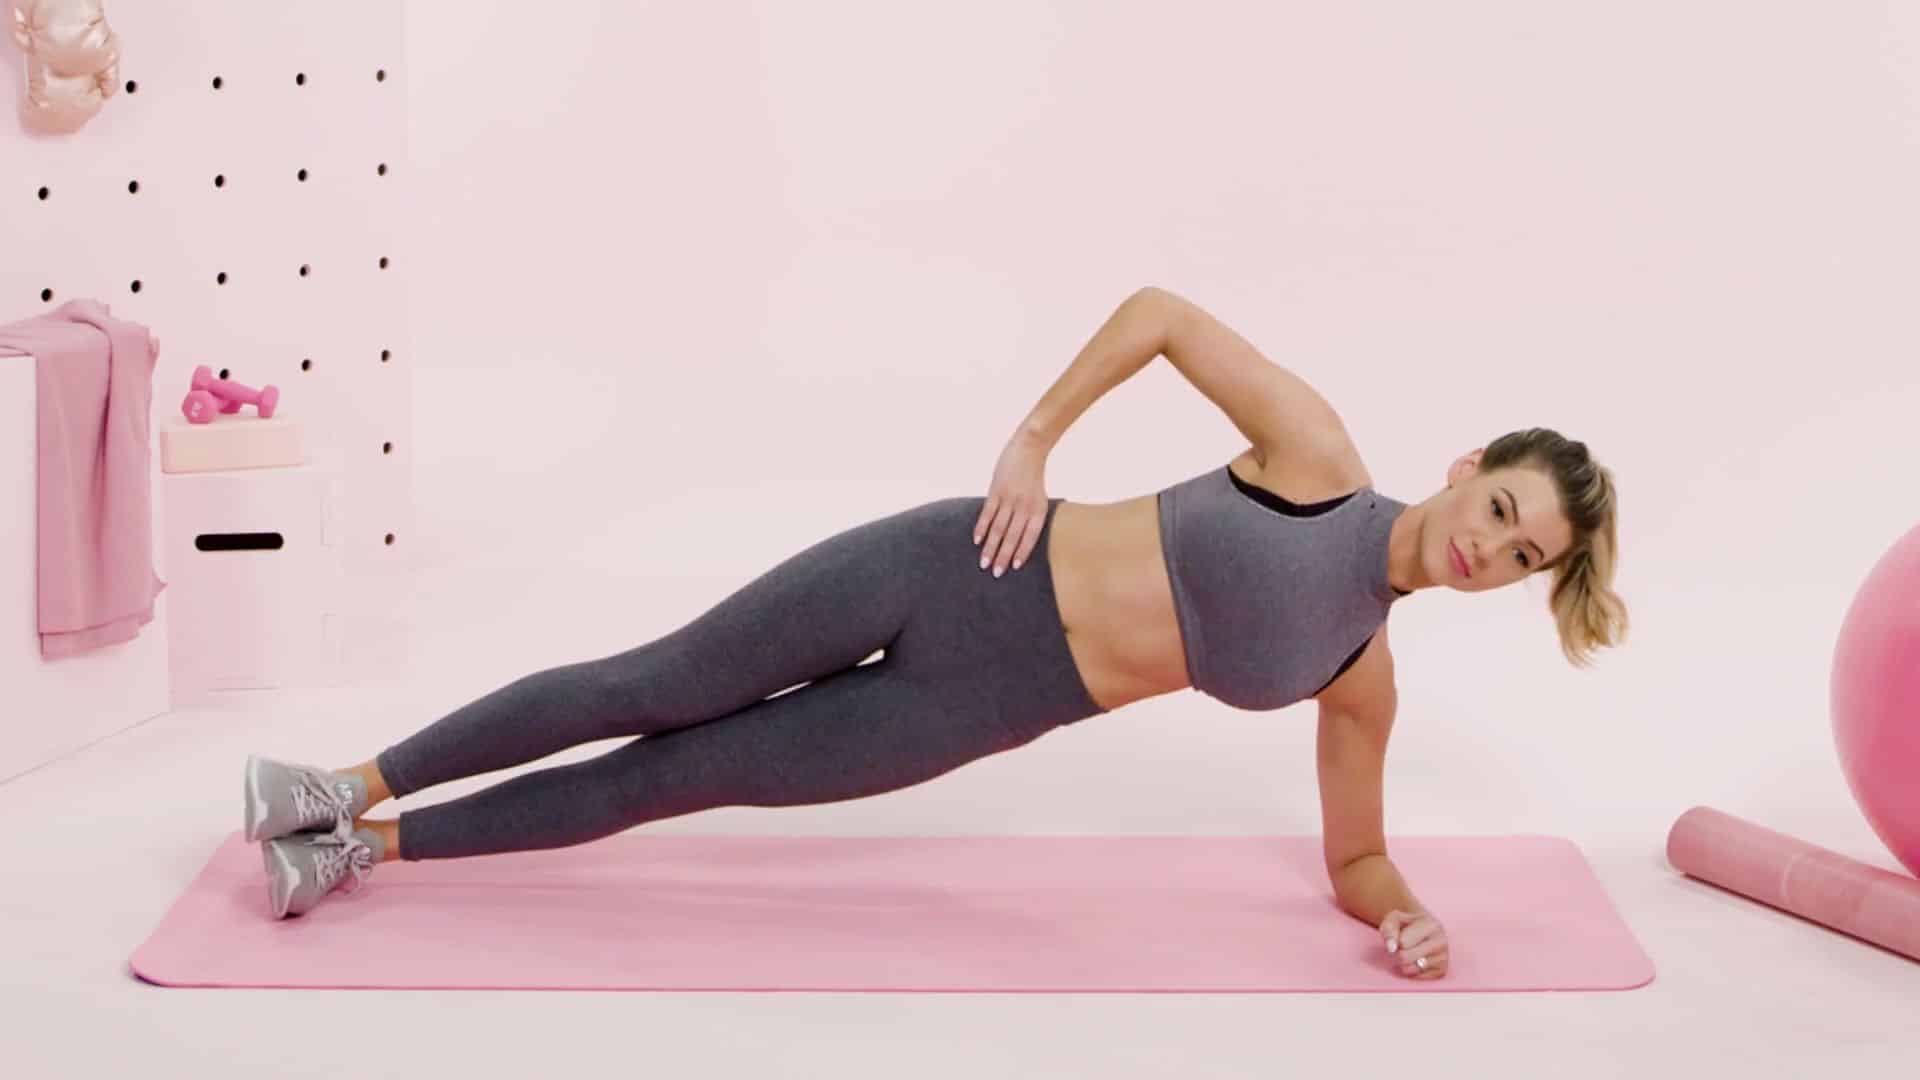
Practice on both your right and left side each time. Getting to ten may take you a few weeks, but you can get there if you start small! You may desire to try leaning against a wall as you learn how to balance for the Side Plank. Modification: Keep your knees on the floor and raise only your upper body.((My Health Alberta:
Side Plank, Beginner))

8. Standing (or Bent Knee) Push-ups
Standing Push-ups are better for low back pain sufferers because less pressure is placed on lower back muscles. Your upper back is engaged, but your hips and abdomen are not drawing your body down during the exercise. Standard Push-ups are sometimes best left for when your lower back muscles have healed and can help you keep your body off of the ground. Place your hands on a wall at arm’s length and your feet flat on the floor. Bend your elbows until your forehead gently touches the wall or comes close. Repeat slowly ten to twenty times.((Trainer:
The Top 5 Upper Body Exercises For Women))
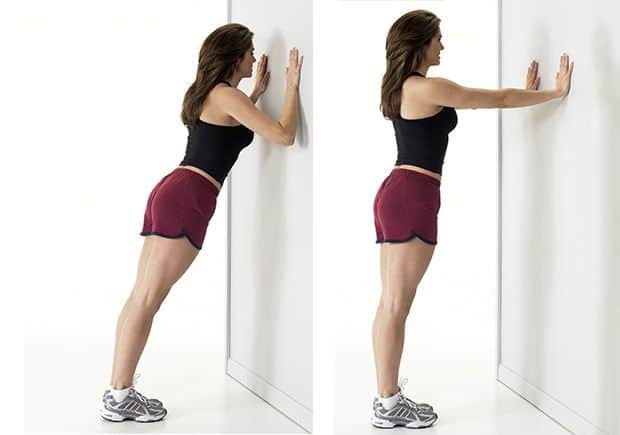
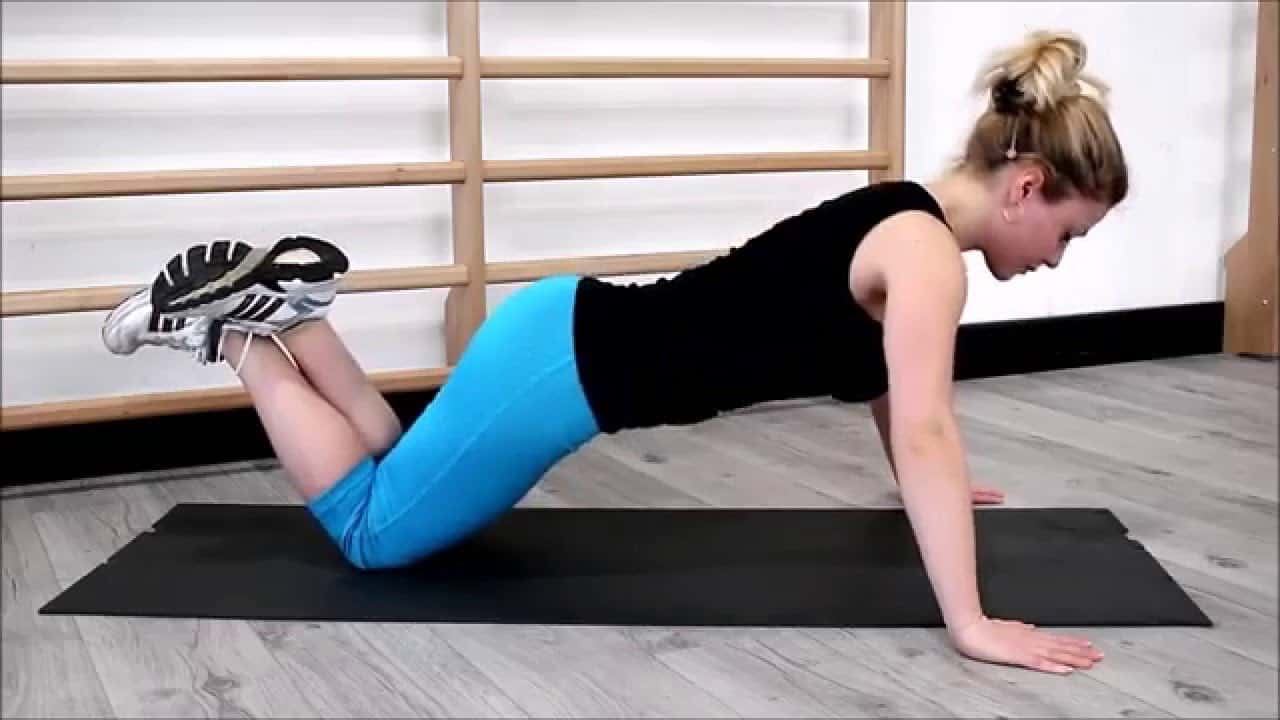
For Bent Knee Push-ups, complete the same repetitions but with your hands and knees on the floor instead of in a standing position.((Fitnesslane: How to:
Knee push ups))
Overall Core Exercises
The core of your body has been designed to help keep you upright when sitting and walking. Injuries on one side of your body often affect the other side in some way, even if we do not consciously realize it. Your spine is supported by many muscles that will do their best work in cooperation with one another.((American Association of Neurological Surgeons:
Low Back Strain and Sprain)) Bring these core exercises into your day to help your lower back begin to function more efficiently and with less pain.
9. Knee to Elbow Lifts
Start in a Front or Modified Plank Position (see exercises 5 and 6) with your hands and feet on the floor. Bring your right knee close to your right elbow. Hold for a count of five (if you can).((Sassy Fit Girl:
Plank Exercises))
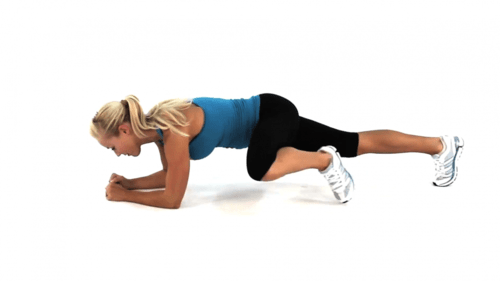
Once you practice this a few times, you may be able to touch your elbow with your knee. Focus on trying to keep your body as parallel to the ground as you can without straining. Switch sides. Repeat three to five times.
10. Knee to Opposite Elbow Lifts
Complete the same steps as Knee to Elbow, but bring each knee to the opposite elbow instead of reaching to the same side. In the beginning, you may only be able to bring your knee halfway across your body. That is a wonderful start! Focus on keeping your body parallel to the ground. Working on decent form is far more important than how far your knee comes toward the center of your body or your chest.
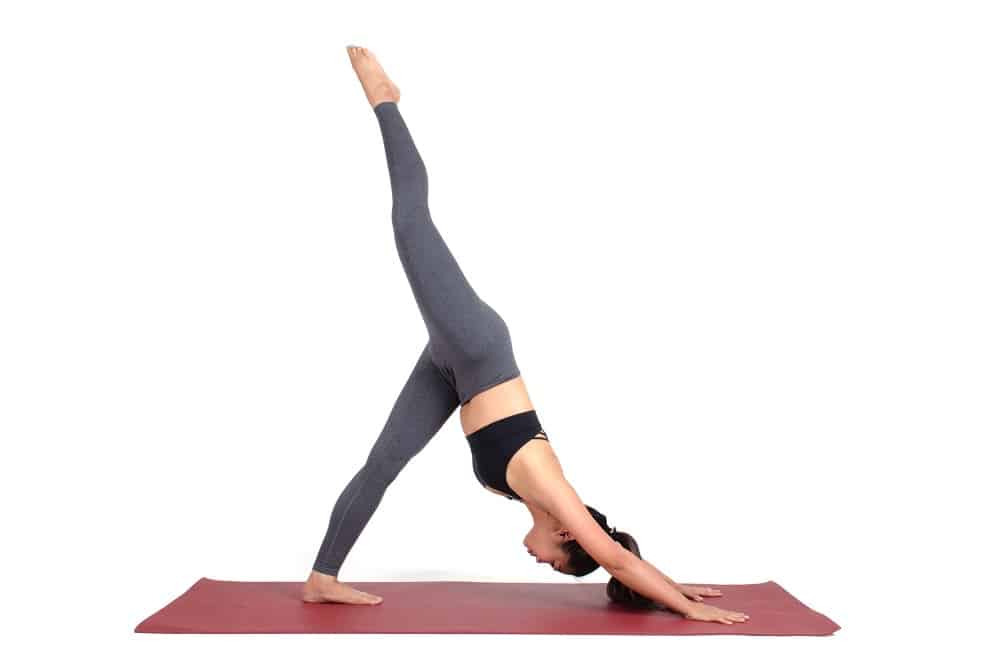
11. Three Legged Dog
Begin in a Front Plank or Modified Plank Position (see exercises 5 and 6). Raise your right leg straight up and behind you as high as you are able. Ideally, your leg may end up much higher than the rest of your body, or it may stay close to the same height. Try to keep your hips squared. You may choose to keep your foot and ankle at a 90-degree angle or point your toes. Ideally, you want to create a line from your hands to the heel of your raised foot.((Fitness 1440:
Three Legged Dog)) Hold for a count of three to ten. Switch sides for your raised leg. Repeat three to five times as you can without causing strain.
12. Stargazer (Kneeling Side Plank)
Sit on the floor with both legs straight in front of you. Bend your right knee and rest your right foot to your left inner thigh. Place your right hand behind you. Raise your left hand high above you as you push your body up from the floor. Straighten your left leg as you go up. Your weight will rest on your right hand and bent right knee.
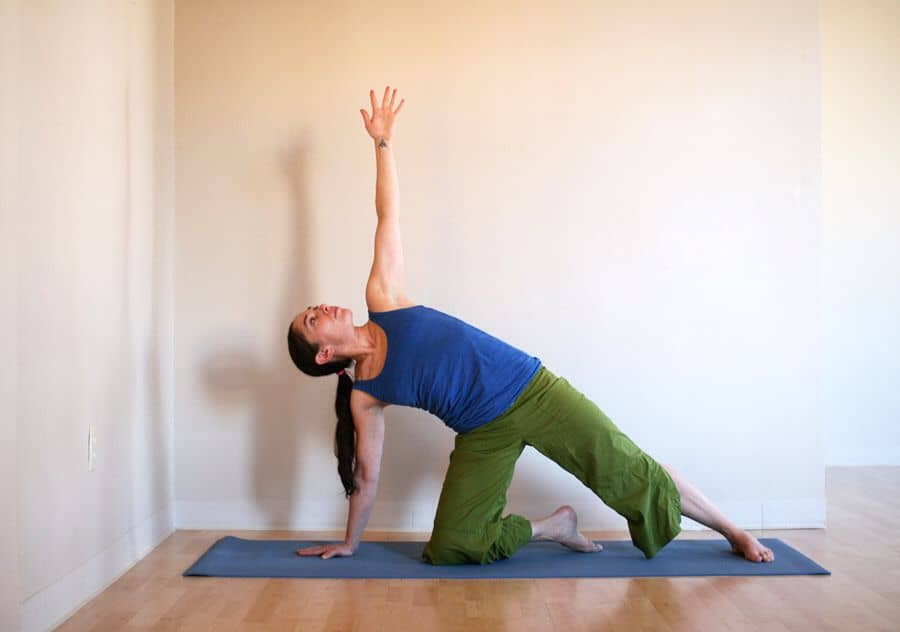
Stargazer may sound like a balancing act, but you can place your feet comfortably so you do not feel as though you will topple. Hold for a count of three to ten. Switch sides. Repeat three to ten times. Remember to lift your face and enjoy the view, especially if you choose to enjoy this exercise outside under the night sky!
Exercises to Avoid
Back pain does not need a new excuse to cause you discomfort as you work to heal. Remember to avoid these exercises as you recover from your lower back pain:
- Toe Touches
- Full Sit-ups
- Double Leg Lifts (Single Leg Lifts are beneficial if you are comfortable with doing them. Be sure to keep your back flat and level on the floor.)
Exercises that cause frequent or intense twisting motions are also best left for another time.
My Favorite Stretches for Relaxing the Back
Stretching is essential for building muscle strength efficiently. The combination of strengthening and stretching can help you create a wall of resistance against low back pain.((Harvard Health Publishing:
Daily moves to prevent low back pain)) For added interest, alternate your chosen back strengthening exercises with a few of these yoga-style stretches:
Moving Forward without Lower Back Pain
Getting started may be the hardest part of using lower back strengthening exercises to help you get rid of your discomfort. Once you have tried a couple and fallen over a time or two, you may begin to realize that these 12 exercises are not as daunting as you expected.
Start with 3 a day and rotate as you try the different exercises. You do not need to learn to do all of them to develop the strength that you need to minimize or eradicate your back pain. You only need to find a few that you enjoy and are willing to do regularly enough to retain the benefits of your hard work. Choose two exercises per commercial during your favorite show. Pick one to do while you wait for your coffee to brew in the morning. Have one in mind to try when it is your turn to wait for the bathroom. Create a challenge chart and put it next to the kids’ chore chart to keep you motivated. Have your friends help you decide on a reward for a goal that you set for yourself. What will your goal be? Perhaps, a pain-free weekend adventure with the kids!

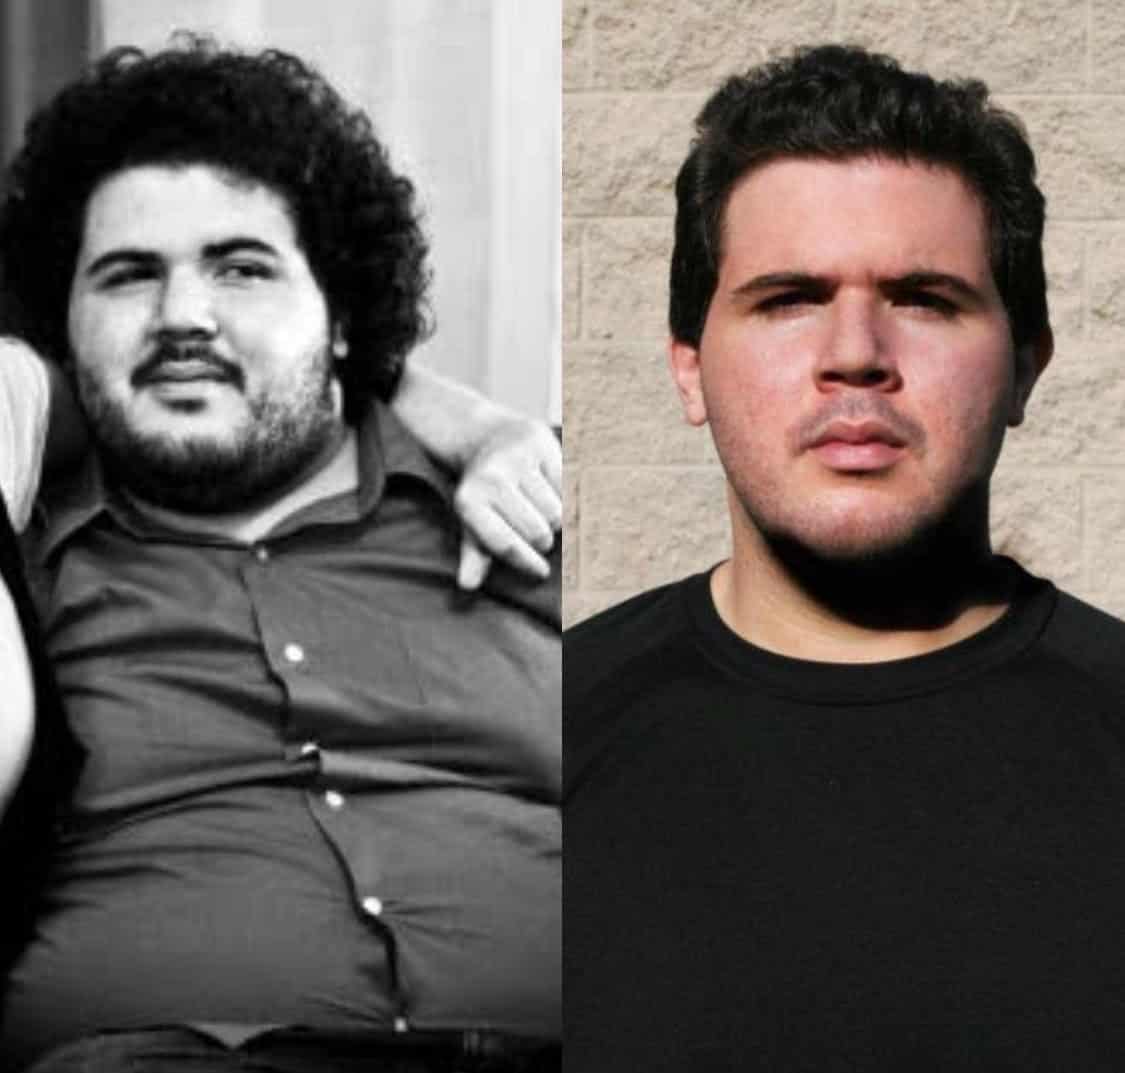 Why I was struggling? Because I lacked the knowledge of what to do. How to fix it? By learning what will work. Not what I think might work, but what actually works. Based on experience, I can honestly tell you that 7 out of 10 personal training clients share the same problem. They're struggling to lose weight. When this situation arises, it's all about analyzing the amount of output and input in our bodies. Going to the gym and doing random exercises is not enough anymore. It's all about building a customized plan that works for you. Same with nutrition, someone else' diet may or may not work for you. Finally, we need to consider lifestyle behaviours as well.


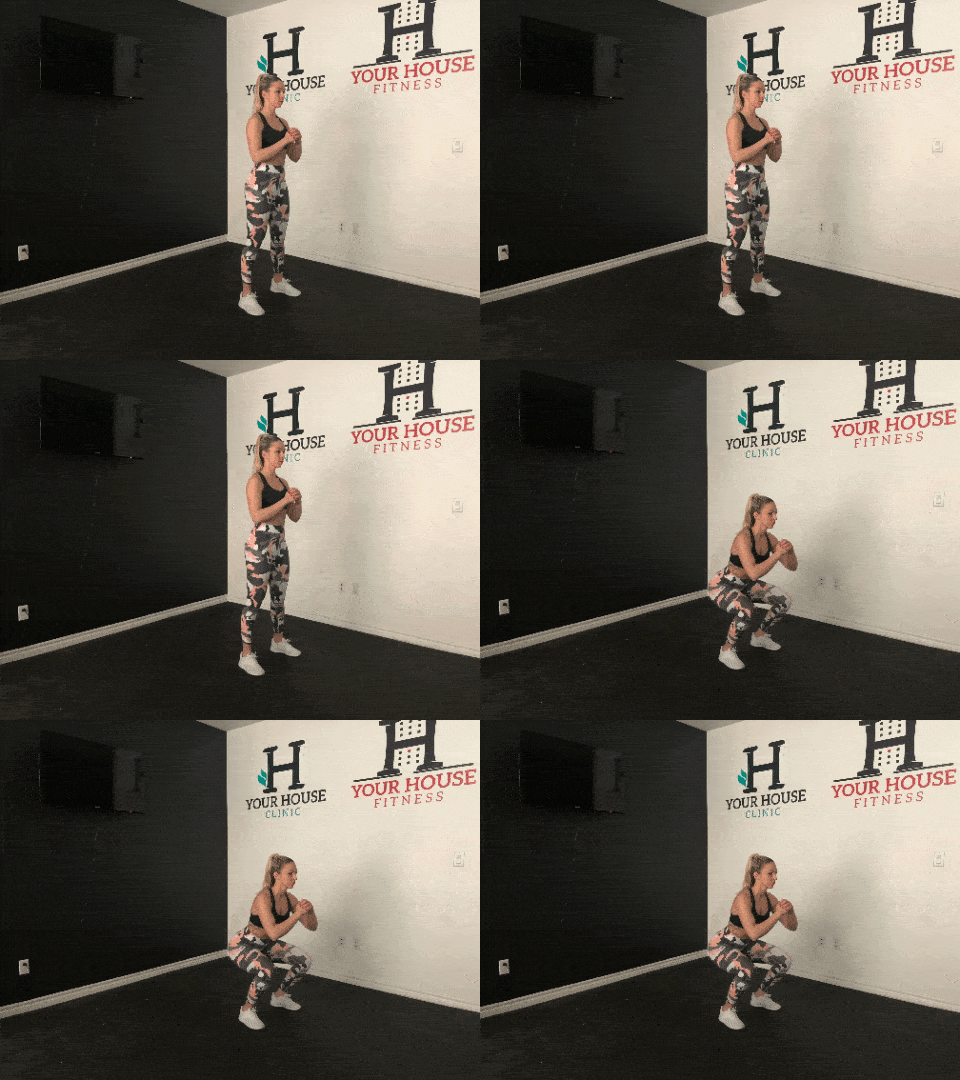

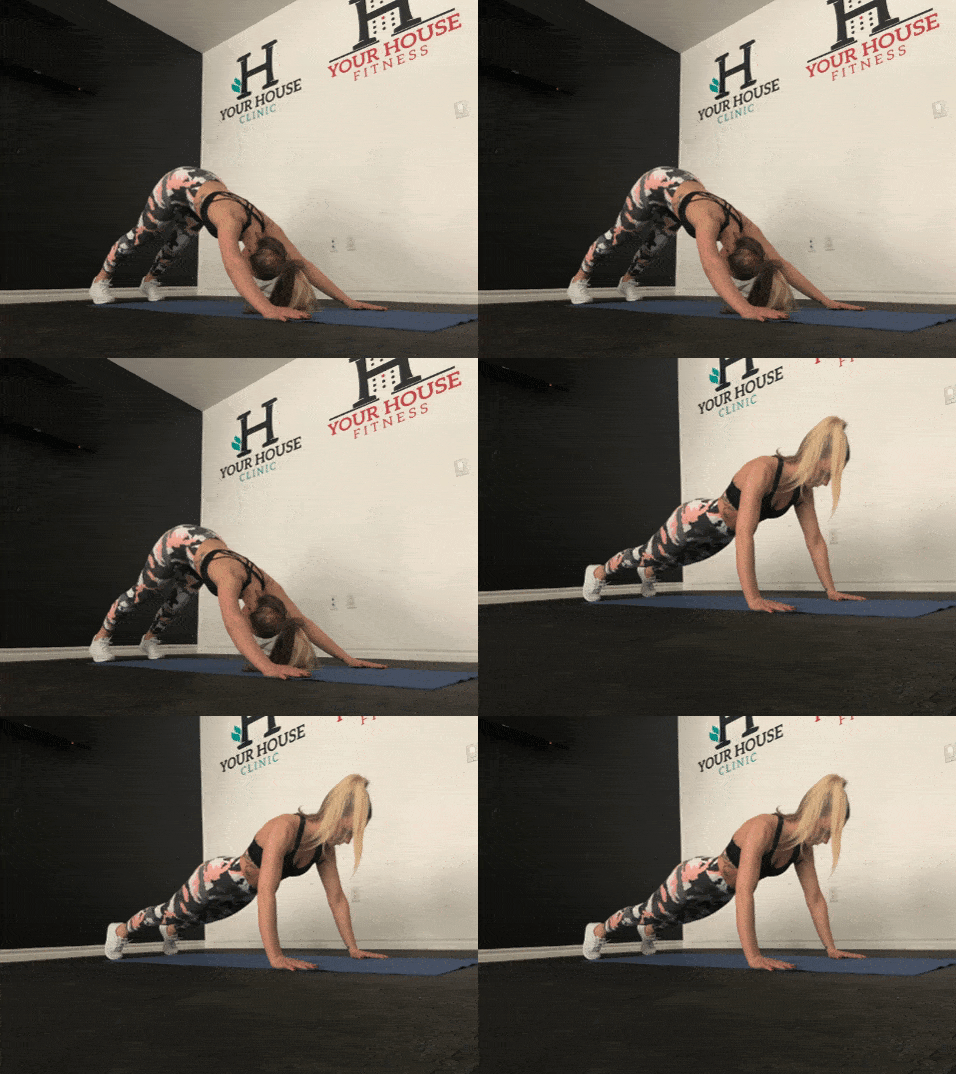

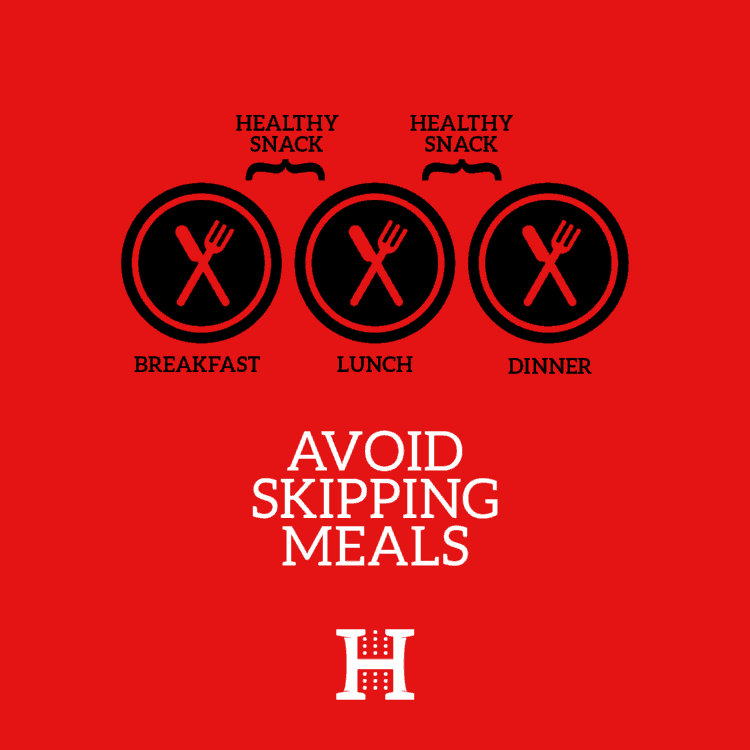

 If you're struggling to lose weight, these are some potential causes that you should check in with yourself. Follow the above weight loss hacks, and gradually you'll find yourself losing some weight and leading a healthier lifestyle. Keep it up!


 A great yoga practice begins with the breath. It's a simple yet powerful way of connecting to your own body and noticing any sensations that arise. Find a seated position with your partner, your backs touching. With eyes closed, tune into you breathing, and begin to deepen the inhales and the exhales. You will feel the rise and fall of your partner's breathing, as you tune into each other's rhythms. See if you can still maintain your own breath, even when it becomes tempting to mirror the breathing of your partner; allow this rhythm to lull you deeper into becoming present and aware of each other's space. Even in unity, you honor your own body and breath, and that honor extends outward to your partner. With this life force - prana ((J Altern Complement Med. :
 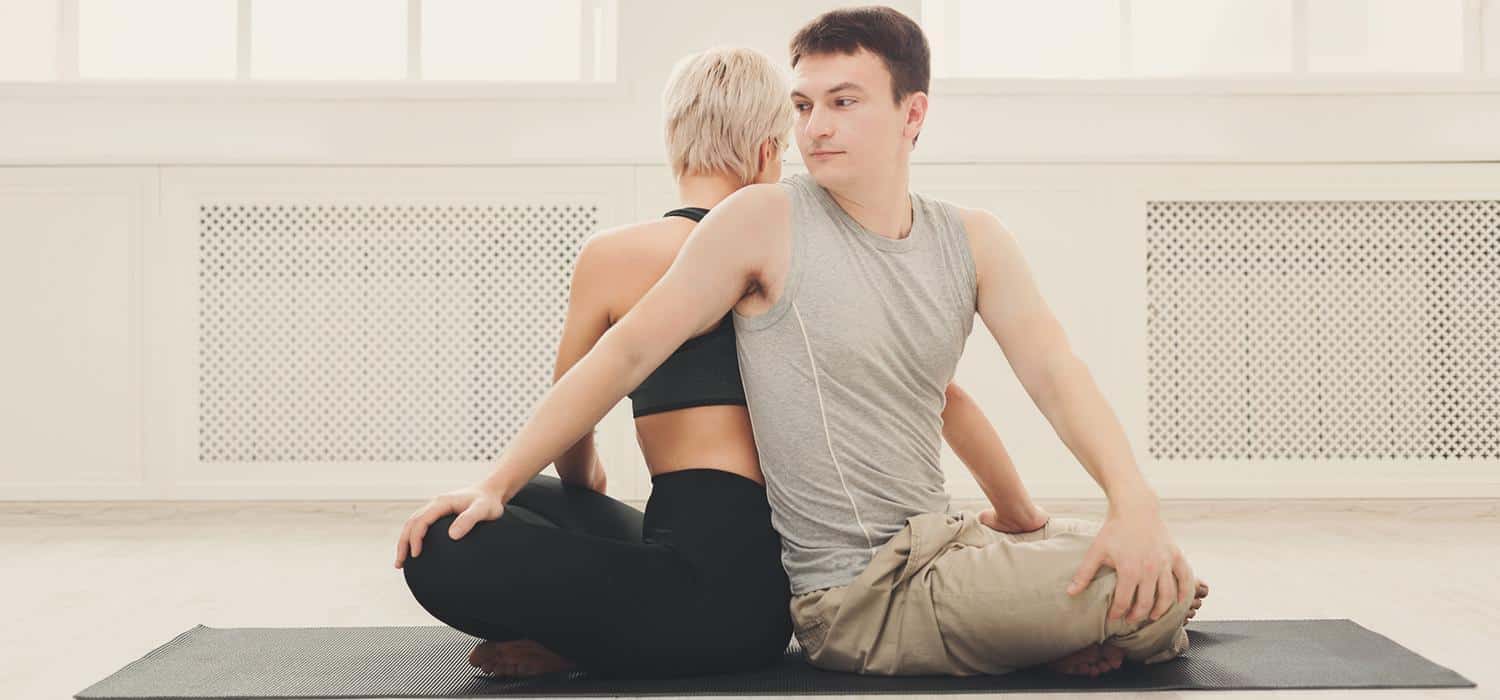 A twist is a great natural detox for the body. When the torso is twisted in the opposite direction, the movement acts as a wringing action for the internal organs, and via an exhale, built-up toxicity can be eliminated from the body.((Shape:
 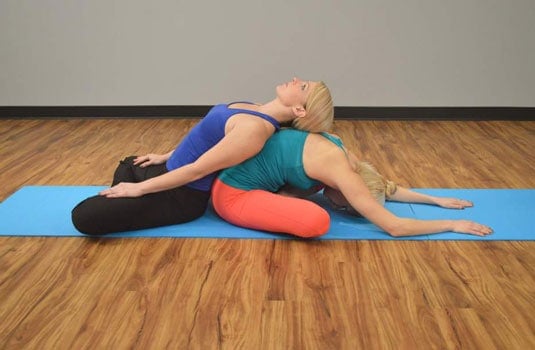 While your backs are still touching, communicate who will fold forward and who will come into a backbend. You'll have a chance to switch sides. The person folding forward will reach their hands forward and either rest their forehead down on the mat, or place it on a block for support. The person doing a backbend will lean back on their partner's back and open the front of their heart and chest. Breathe deeply here, and see if you can feel each other's breaths again. In yoga, the heart is thought of as the place in front and back of your chest, as it's the same area opening. So in this pose, even though you're doing the opposite move, your hearts are still connected. Think about how that translates to your relationship off the mat. Stay in this pose for 5 full breaths, and switch when you're both ready.
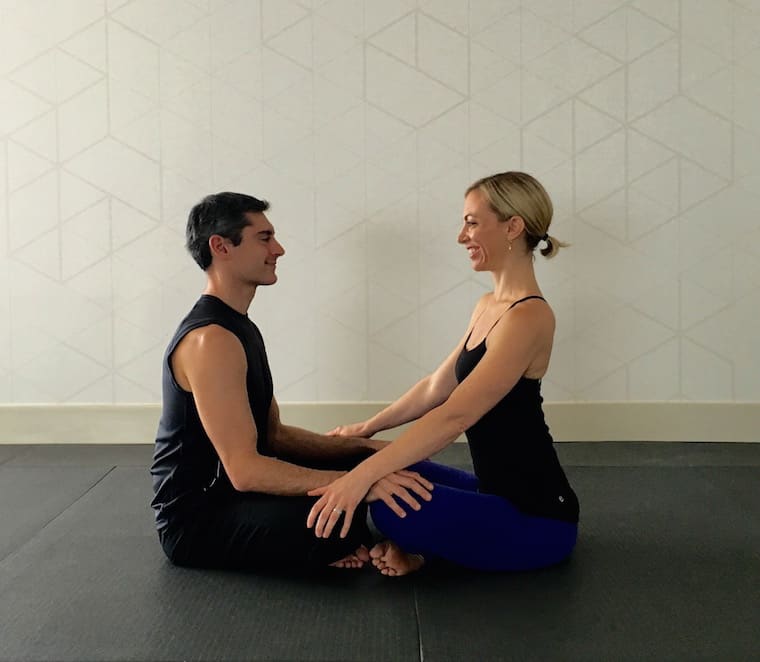 This exercise is deeply personal and nourishing, as you sit facing your partner, gently gazing into their eyes. Rest your hands on their knees or in their hands, and allow them to do the same. This will further connect you with the power of touch. Once you're settled (and the giggles have subsided from direct eye contact), begin to truly see your partner. In the chaos of our days and weeks, we don't often get the chance to sit down and take in the person with whom we share our life. Gently gaze and take in your partner's features, uniqueness, and energy, and allow them to see you in return. Not only is this centering for the rest of your practice, it's also deeply loving and compassionate. Stay in this exercise for 5 minutes or longer, if you both feel tuned in.
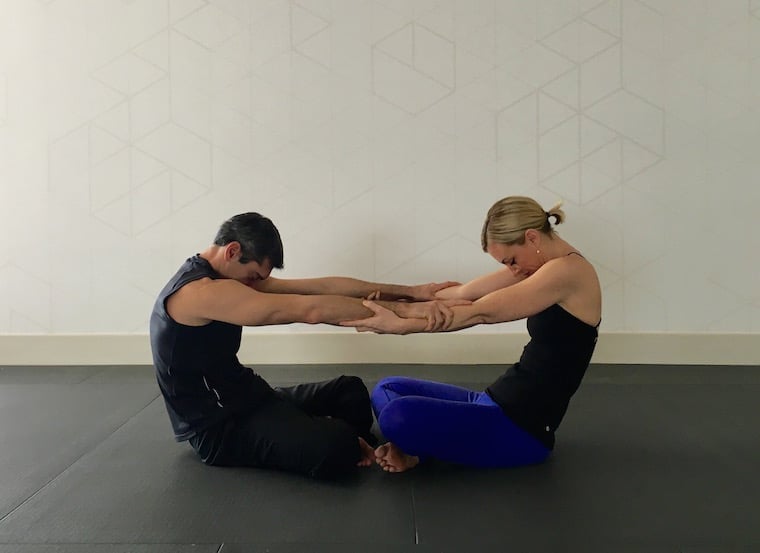 From a seated position, reach for your partner's forearms and interlace. As you inhale, arch your back and lift your heart to the sky, maybe even lifting the gaze to expose and open the throat. As you exhale, round the spine and pull back, using the resistance of each other's arms as support, bringing the gaze inward toward your chest. Repeat the movements 3-5 times, or as long as you feel comfortable. Allow this support from your partner to begin to build trust and surrender, as well as communication. Speak out to what feels good in this pose, and ask your partner the same. While the pose is done in tandem, your experience of it in your own body is going to vary. Take this time to share those sensations, and become curious of your partner's.
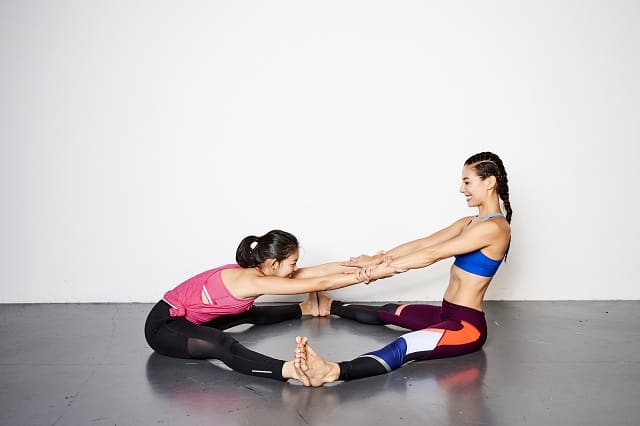 In relationships, we know that we don't have to do everything on our own. We have our best ally in our corner to help us out. Likewise in this pose, come into a wide-legged seat with the soles of your feet touching. Reach the arms forward and interlace, and then take turns gently pulling one another closer past middle, using each other as resistance in this Forward Fold. Stay here for 5 full breaths each. While this pose is a deep stretch, maybe opt for more of a playful approach! If laughter comes naturally or someone cracks a joke, go along! Find fun in working out and being with one another. It's a surefire way to relieve any stress or tension, and remind each other of the simpler things that bring you both some more smiles.
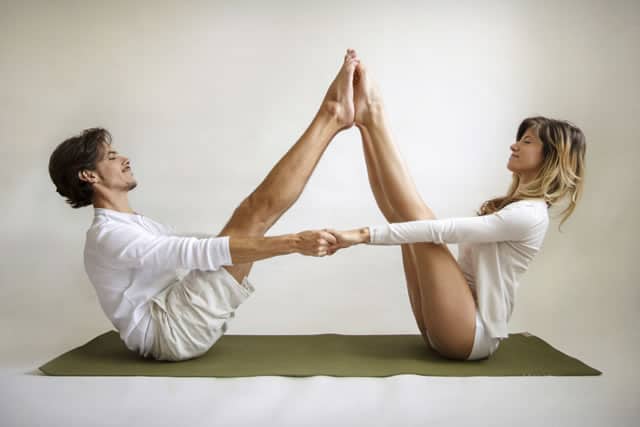 When it comes to postures that are challenging, having a partner mirroring and supporting you can go a long way to giving you that extra boost of confidence and energy. And because they're doing it with you, too, you can both share in the achievement of rocking this core-engaging posture. Start in a seated position, facing one another, a little further away to give enough room for extending the legs. When you're ready, come into
  Speaking of building trust, this pose will give you and your partner a chance to work together toward a common goal. This pose is also all about communication, and speaking your mind when you're ready to come down or are feeling a sensation that you'd like to share with your significant other. With your partner in traditional Downward Dog, set yourself up by coming into a Forward Fold at the top of the mat. Lifting one foot at a time, place your feet at the base of your partner's spine. You may need to adjust your feet or walk your hands back once you get into this, to readjust. Once in the pose, breathe there for 5 full breaths, before you switch. After you come out, touch base on how it felt and what you experienced. Share in the pose together by bringing in your specific perspective.
 If it's not evident from the photo above, this pose is all about creating love - literally and symbolically. Begin in
  No man is an island, and likewise, no tree thrives without support. In this partner pose, begin in your own Tree, by lifting one leg and pressing the sole of the foot into the thigh or down lower on the calf. When you've caught your balance, extend one hand to your partner's and meet them, palms touching, in the center between your respective Tree postures. Take your other hand and reach it back behind your partner, giving them a loving embrace. Stay here for 5 full breaths before switching sides. Even though your Tree pose is your own, find the center connection that brings you both together in unity. Allow yourself to feel and appreciate the support you get from your partner, on and especially off the mat.
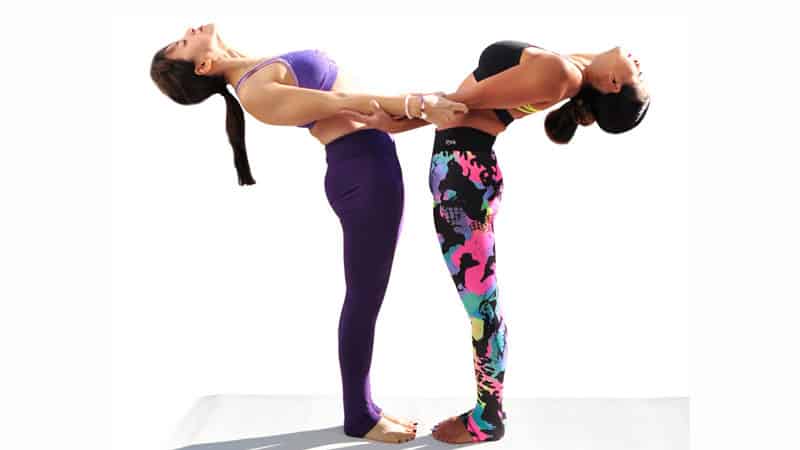 Opening our hearts to each other is the most raw way of showing our vulnerability. That's why this pose is so powerful in tandem. By using each other for support, you're reassuring your partner that anything is possible (and better) when you have each other. Start standing and facing each other, as you interlace each other's forearms. Take a deep breath in as you hold each other's gaze, and on an exhale, lean back to open your heart to the sky, using each other's arms as resistance. Stay here for 5 full breaths, or as long as it's comfortable for you both. Release and end with a hug, honoring the space you've created for each other and yourself.